 BuzzKit
You have a clip you want to keep, but the sound has to go. Maybe it is wind noise, a conversation you should not share, or music you cannot use. The good news is that you can remove audio from video without losing quality, because the picture and the sound are stored as separate tracks and the picture does not need to be touched at all.
This guide shows how to strip the audio track in your browser with the BuzzKit Mute Video tool, explains why the picture stays identical, and gives you a way to prove it on your own file.
The short answer
Use a tool that copies the video stream and drops the audio stream, instead of exporting the whole clip again. Copying leaves every video frame exactly as it was. Re-exporting recompresses the picture, which is where quality is lost.
How to remove audio from a video in your browser
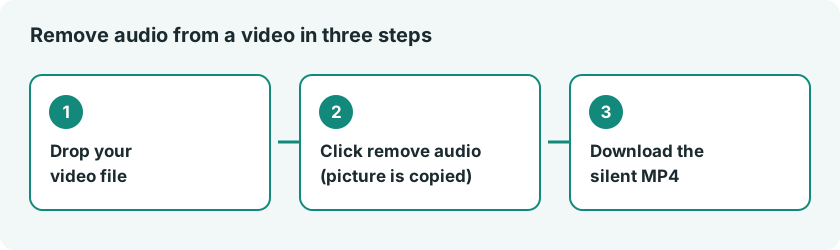
- Open the Mute Video (Remove Audio) tool and drop in your MP4, WebM or MOV file.
- Play the preview to confirm it is the right clip.
- Click Remove audio. The tool copies the video stream and leaves the audio track out.
- Download the silent MP4 and play it once to check that it has no sound.
The work happens inside your browser tab using ffmpeg compiled to WebAssembly, so the video is never uploaded. If you want to confirm that for any site, our 5-minute upload test shows how.
Why removing audio does not have to reduce quality
A video file is a container holding separate streams: one for the picture, one or more for sound. Removing the sound means leaving a stream out when the new file is written. The picture stream can be passed across untouched, which ffmpeg calls a stream copy. In ffmpeg terms, -an drops the audio and -c:v copy copies the video.
Quality is only lost when the picture is decoded and compressed again. That happens when an editor re-exports the whole project, or when a website converts your clip as part of the job. Each extra compression pass can add blockiness and blur, and it also takes much longer than a copy.
| Method | Picture stays identical? | Speed |
|---|---|---|
Stream copy (Mute Video tool, ffmpeg -c:v copy) | Yes, frames are copied as they are | Fast, even for long clips |
| Re-export from a video editor | Depends on export settings, usually recompressed | Slower, scales with clip length |
| Upload-based converter sites | Varies by site, and the file leaves your device | Depends on upload and queue |
We checked: the picture is bit-for-bit identical
Claims about “no quality loss” are easy to make, so we tested the operation itself. We generated a 10-second, 1280×720 H.264 test clip with an AAC audio track, removed the audio with a stream copy (the same operation the Mute Video tool performs), and compared the video data before and after.
| Measurement | Result |
|---|---|
| Original file size | 3,947,012 bytes |
| Muted file size | 3,779,860 bytes (about 4% smaller) |
| Audio stream size | 161,922 bytes |
| Streams in the muted file | Video only (H.264, 1280×720, same bitrate as the original) |
| MD5 checksum of the video data, original | 79c0ee64240d1e133937420180bddd8b |
| MD5 checksum of the video data, muted | 79c0ee64240d1e133937420180bddd8b (identical) |
| Same clip re-encoded while muting | Different checksum (18bd5c4cfe3475db9d9a28f58b0473fa) |
Identical checksums mean the video data is the same, byte for byte. The re-encoded version produces a different checksum because the picture was compressed a second time. The size difference between the two files matches the audio stream, with a few kilobytes of container overhead making up the rest.
This was a synthetic test clip, so your own file will have different sizes, but the principle is the same for any video.
How to verify it on your own video
If you have ffmpeg installed, you can run the same check. The first command makes a muted copy, and the next two print a checksum of the video data in each file. If the two checksums match, the picture was not changed.
ffmpeg -i original.mp4 -an -c:v copy muted.mp4
ffmpeg -i original.mp4 -map 0:v:0 -c copy -f md5 -
ffmpeg -i muted.mp4 -map 0:v:0 -c copy -f md5 -
When removing audio is not enough
- You only want to silence part of the clip. The tool removes the whole audio track. To keep sound for some sections, trim the video into the parts you need first, then mute only those.
- You want to replace the sound. The tool only removes audio, it does not add a new track yet. Mute the clip here, then add your music or voiceover in an editor.
- The file will not process. Most common formats work. If one fails, change its format with the Video Converter and try again.
- You want a much smaller file. Audio is usually a small share of a video, about 4% in our test clip, so muting alone will not shrink it much. Use the Video Compressor and read our guide on how to compress a video without losing quality.
Common reasons to mute a video
- Background noise, wind or a private conversation you do not want to share.
- A silent loop for a website background, presentation or digital display.
- Preparing footage for a voiceover recorded separately.
- Music in the original soundtrack that you do not have the rights to use.
Tips before you share the silent clip
- Keep the original. A muted file cannot get its sound back, so save the result under a new name.
- Play it before you send it. Turn your volume up and confirm there is no audio.
- Trim first, mute second. A shorter clip is quicker to process and easier to share.
Related guides
To cut the clip to length before muting, read how to trim a video for free. If you are wondering whether free tools are safe with your files, see our audit of all 28 BuzzKit tools for file uploads.
Want the full details of stream selection and copying? The official ffmpeg documentation covers the -an and -c copy options.
Frequently asked questions
Does removing audio from a video reduce its quality?
Not when the video stream is copied. The picture is passed to the new file without being decoded or compressed again, so it stays identical to the original.
Is my video uploaded when I remove the audio?
No. The audio is stripped in your browser tab using ffmpeg compiled to WebAssembly, so the file stays on your device.
What format is the muted video?
You get an MP4 with no audio track.
Can I add new music after removing the audio?
Not in this tool. It only removes the existing audio. Add your own track afterwards in a video editor.
Silencing a clip should take seconds, not a re-export. Open the Mute Video tool, drop in your file and download a silent copy with the picture left exactly as it was.